 Image 1 of 1
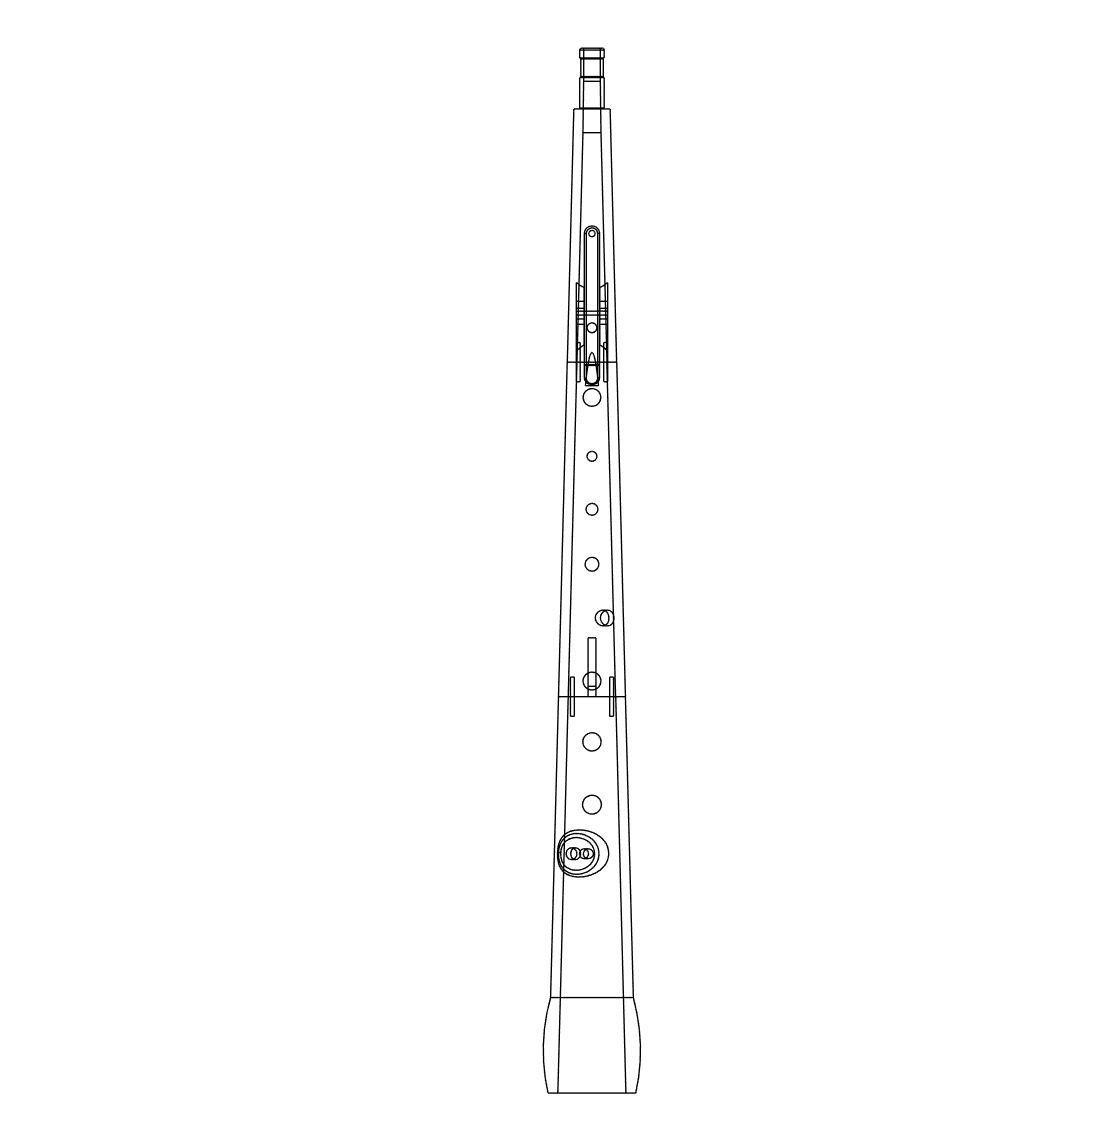
One of my past projects, a kaval-tarogato hybrid. This project is the simplest of my 3D printable projects and is ideal for people with moderate instrument building/repair and 3D printing experience. Uses a soprano sax mouthpiece.
Min build height: 202mm
No supports needed for body joint. Enable supports for key (for spring hole)
Recommended filament: PLA+ or ABS
With a 0.4mm nozzle, use 5 walls for body joints and mouthpiece and 20 walls for key
2 parts slow cure epoxy
8x Panel board nails or 2mm steel or carbon fiber rod cut to 19mm
2mm stainless steel rod cut to 18mm, de-burr both ends.
10mm wide strip of 3/64” (1.2mm) sheet cork or thread for mouthpiece tenon
Clamp capable of extending at least 510mm
2mm drill bit
15mm long x 4mm diameter x 0.4mm wire diameter spring
Sandpaper (80-320 grit)
Rubber gloves
Contact cement
1/16 closed cell neoprene foam sheet
10mm hole punch
Print all parts per above. Clean off any glue residue from base.
Place the sandpaper on a flat surface, use it to roughen up the ends of the body joints with pin holes. This will help the glue adhere
Test fit the 8 pins in the pin holes, use the 2mm drill bit to clean the holes if needed.
Put on rubber gloves. Mix a small amount of the two part epoxy. Coat the ends of the body joints with pin holes with a thin coating of epoxy and then coat the 8 pins with epoxy. Quickly coat the pins with a thin layer of epoxy and insert all pins into both ends of body joint 2. These should then line up with the holes on joints 1 and 3. Push all joints together as much as possible and use the clap to keep everything tight. This will be the messiest step, use rubbing alcohol and paper towels to clean up excess epoxy.
Use the 2mm drill bit to clean the hole in the key. make sure the 2mm rod spins freely in the key.
Use the 10mm hole punch to cut a 10mm disc from the neoprene foam. Use the contact cement to attach it to the bottom of the key opposite from the wedge shaped end. This will be the pad for the octave key.
Once the epoxy has cured, hold the spring in the small hole between the two key blocks (the two protrusions on joint 1). Place the key over so that the spring goes into the hole on the key. Push the key on so that the through hole on the key lines up with the holes on the key blocks. Push the 2mm rod through this hole. Brass jawed pliers may be needed.
Use contact cement to attach the tenon cork.
One of my past projects, a kaval-tarogato hybrid. This project is the simplest of my 3D printable projects and is ideal for people with moderate instrument building/repair and 3D printing experience. Uses a soprano sax mouthpiece.
Min build height: 202mm
No supports needed for body joint. Enable supports for key (for spring hole)
Recommended filament: PLA+ or ABS
With a 0.4mm nozzle, use 5 walls for body joints and mouthpiece and 20 walls for key
2 parts slow cure epoxy
8x Panel board nails or 2mm steel or carbon fiber rod cut to 19mm
2mm stainless steel rod cut to 18mm, de-burr both ends.
10mm wide strip of 3/64” (1.2mm) sheet cork or thread for mouthpiece tenon
Clamp capable of extending at least 510mm
2mm drill bit
15mm long x 4mm diameter x 0.4mm wire diameter spring
Sandpaper (80-320 grit)
Rubber gloves
Contact cement
1/16 closed cell neoprene foam sheet
10mm hole punch
Print all parts per above. Clean off any glue residue from base.
Place the sandpaper on a flat surface, use it to roughen up the ends of the body joints with pin holes. This will help the glue adhere
Test fit the 8 pins in the pin holes, use the 2mm drill bit to clean the holes if needed.
Put on rubber gloves. Mix a small amount of the two part epoxy. Coat the ends of the body joints with pin holes with a thin coating of epoxy and then coat the 8 pins with epoxy. Quickly coat the pins with a thin layer of epoxy and insert all pins into both ends of body joint 2. These should then line up with the holes on joints 1 and 3. Push all joints together as much as possible and use the clap to keep everything tight. This will be the messiest step, use rubbing alcohol and paper towels to clean up excess epoxy.
Use the 2mm drill bit to clean the hole in the key. make sure the 2mm rod spins freely in the key.
Use the 10mm hole punch to cut a 10mm disc from the neoprene foam. Use the contact cement to attach it to the bottom of the key opposite from the wedge shaped end. This will be the pad for the octave key.
Once the epoxy has cured, hold the spring in the small hole between the two key blocks (the two protrusions on joint 1). Place the key over so that the spring goes into the hole on the key. Push the key on so that the through hole on the key lines up with the holes on the key blocks. Push the 2mm rod through this hole. Brass jawed pliers may be needed.
Use contact cement to attach the tenon cork.